ReviewCoreASPHosting.NET | Best and cheap ASP.NET Core 2.0 hosting. One of the brand new features added to ASP.NET Core in version 2.0 preview 1 is Razor Pages. This harks back to the (terribly named) ASP.NET Web Pages framework, which was a simpler, page-based, alternative framework to MVC. It was a completely different stack, and was sort of .NET’s answer to PHP.
I know, that might make you shudder, but I’ve actually had a fair amount of success with it. It allowed our designers who had HTML knowledge but no C# to be productive, without having to deal with full MVC. Web developers might turn their nose up at that, but there’s really no reason for a designer to go there, and would you want them to? A developer could just jump on for any dynamic bits of code that were beyond the designer, but otherwise you could leave them to it.
This post dips a toe into the justification of Razor Pages and when you might want to use it in your own ASP.NET Core applications.
What are Razor Pages?
The new Razor Pages treads a line somewhere between ASP.NET Web Pages and full MVC. It’s still a “page based” model, in that all the code for a single page lives in one file, and that file is used to describe the URL structure of the app.
This makes it very easy to reason about the behaviour of simple apps, and removes some of the ceremony of creating new pages. Instead of having to create a controller, create an action, create a model, and create a view, you can simply create the Razor Page instead.
Now granted, for cases where you’re doing anything much more than displaying a View, MVC may well be the correct thing to use. And the great thing about Razor Pages is that it’s built directly on top of the MVC stack. Essentially all of the primitives like model binding and validation are available to you in Razor Pages. Or even better, you could use Razor Pages for most of the app, and fallback to full MVC for the complex actions.
Putting it to the test – the MVC template
As an example, I thought I’d convert the default MVC template to use Razor pages for the simple actions. This is remarkably simple to do and highlights the advantages of using Razor Pages if you don’t have much logic in your app.
The MVC template
The default MVC template is pretty simple – it consists of a HomeController with four actions:
Index()About()Contact()Error()
The first three of these are really simply actions, that optionally set some ViewData and return a ViewResult. These are prime candidates for converting to Razor Pages.
public class HomeController : Controller
{
    public IActionResult Index()
    {
        return View();
    }

    public IActionResult About()
    {
        ViewData["Message"] = "Your application description page.";

        return View();
    }

    public IActionResult Contact()
    {
        ViewData["Message"] = "Your contact page.";

        return View();
    }

    public IActionResult Error()
    {
        return View(new ErrorViewModel
        {
            RequestId = Activity.Current?.Id ?? HttpContext.TraceIdentifier
        });
    }
}
Each of the simple methods renders a .cshtml file in the Views folder of the project. These are perfect of us to convert to Razor pages – they are basically just HTML files with some dynamic regions. For example, the About.cshtml file looks like this:
@{
    ViewData["Title"] = "About";
}
<h2>@ViewData["Title"].</h2>
<h3>@ViewData["Message"]</h3>

<p>Use this area to provide additional information.</p>
So lets convert these to Razor Pages.
The
Erroraction is only slightly more complicated, and could easily be converted to a Razor Page too (as it is in thedotnet new razortemplate). To highlight the ability to mix the two however, I’m going to leave that as an MVC action.
The Razor Pages version
Converting these pages is super-simple, I’ll take the About page as an example.
To turn the page into a Razor Page instead of a view, you simply need to add the @page directive to the top of the page, and move the file from Views/Home/About.cshtml to Pages/Home/About.cshtml.
Razor pages are stored in the pages folder by default.
Finally, we can move the small piece of logic, setting the message, from the action method to the page itself. We could store this in the ViewData["Message"], but there’s not a lot of need in this case as it’s not used in parent Layouts or anything, so we’ll just write it in the markup.
@page

@{
    ViewData["Title"] = "About";
}
<h2>@ViewData["Title"].</h2>
<h3>Your application description page.</h3>

<p>Use this area to provide additional information.</p>
With that, we can delete the About action method, and give it a test!

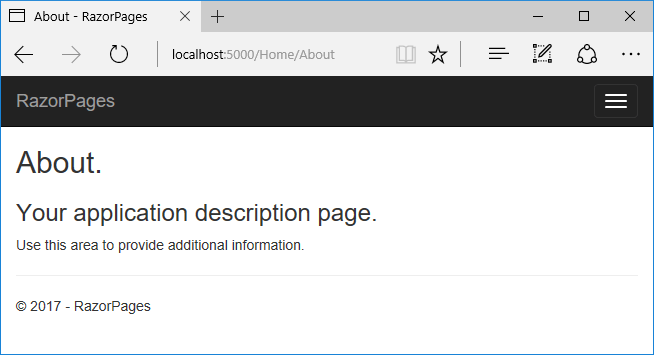
Hmmm, that’s not quite right – we appear to have lost the layout! The Views folder contains a _ViewStart.cshtml that defines the default Layout for all the views in its subfolder (unless overwridden by a sub-_ViewStart.cshtml or the .cshtml file itself. Razor Pages uses the exact same concept of Layouts and partial views, so we can add a _ViewStart.cshtml to the Pages folder too:
@{
    Layout = "_Layout";
}
Note that we don’t need to create separate layout files themselves, we can still reference the ones in the Views/Shared folder – the Views/Shared folder is searched by Razor Pages (as well as the Pages/Home folder in this case, and the Pages/Shared folder). With the Layout statement in place, we get our original About page back!

And that’s pretty much that! We can easily convert the other pages in the same way, and we can still access them at the same URL paths: /Home/About, /Home/Contact and /Home/Index.
Limitations
I actually bent the truth slightly there, we can’t quite use all the same URLs. With the full-MVC template and the default MVC routing template, {controller=home/action=index/id?}, the following URLs all route to the same MVC HomeController.Index action:
/Home/Index/Home/
Those first two work perfectly well with Razor Pages, in the same way as with MVC, thanks to Index.cshtml being considered the default document for the folder. The last one is a problem however – you can’t get this result with Razor Pages alone. And that’s not really surprising – a page-based model implies a single URL – which is essentially what we have.
As far as I can tell, if you want a single action to cover all these URLs you’ll need to fall back to MVC. But then, at least you can, and in those cases, maybe you should! Alternatively, you could create two pages, one for / and one for /Home, and use partial views to avoid duplication of markup between them.
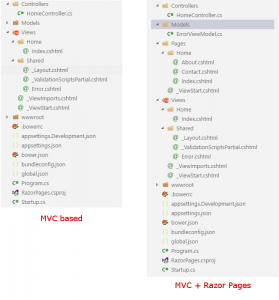
So where does that leave us? Well if we just look at the number of files, you can see that we actually have more now than before. The difference is that you can add a new URL handler/Page by just creating a single .cshtml file in the appropriate Pages folder, no model or controller files needed!

Whether this works for you will depend on the sort of application you’re building. A simple, mostly-static app with some dynamics sections might be well suited to building a Razor Pages app, while a more fully-featured, complicated app most definitely would not!
The real winner here is the ability to combine Razor with full MVC – you can start out building your application with Razor Pages, and if you find some complex pages you have a choice. You can either add the functionality using Razor Pages alone or you can drop back to full MVC, whichever works best for you.
Summary
This post just scratches the surface of what you can do with Razor Pages – you can do far more complicated-MVC things if you like, but personally I fell like if you start doing that, just switch to proper MVC actions and encapsulate your logic properly.
